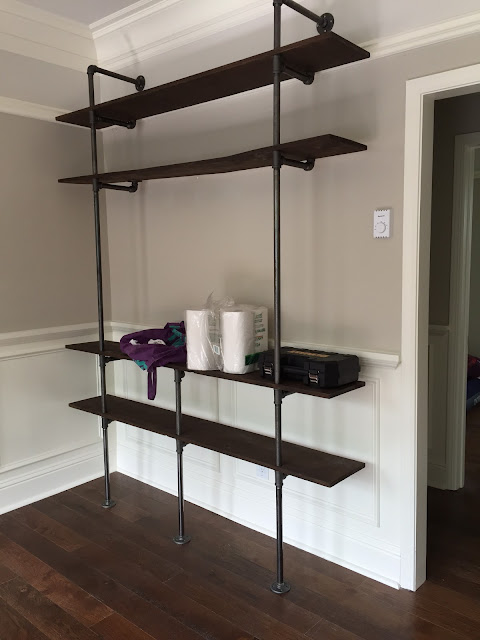
This one was fun! My husband and I moved to San Francisco back in July 2015. We got our current apartment in August and it was a major downsize from our place in Chicago. It has a grand total of 450 square feet and very little closet space. Since I have so much craft stuff, I really needed a place to store it all (I was definitely not about to throw it all out!!!) I started looking on Pinterest for inspiration and came across a ton of posts of industrial shelves made using cast iron piping.
My main inspiration was this picture below:
Here is the finished product (on the right):
I took a ton of pictures of me making it, but I seem to have lost them in transferring to dropbox from my phone. EDIT: My mom found some that I sent her!!!
Here is an overview of my process:
 |
| Planning out the footprint |
 |
| building it from the bottom up! |
- Find the studs. This shelving unit is only secured on the top so it needs to be very secure. I got a stud finder and marked out the studs on the wall.
- Map it all out. I decided to have two large shelves on the bottom for craft storage then two smaller shelves on the top for displaying knickknacks and books. I kept the middle for the TV and speakers (although it was only by sheer luck that the speakers fit!)
- Buy the pipes. I got 3/4 inch pipes because they were cheaper than the 1 inch. I think it looks good. One thing I didn't totally anticipate was that the shelf spacing is actually longer than the pipe length. This is because the joining pieces have some height to them. Keep this in mind when deciding which pipes to buy. Also note that there are supports underneath each shelf. It is easier to see on the upper shelves. I also added a middle support on the bottom. This is because I put a TV in the middle and thought it should have an additional support.
- Drill holes in the shelves. These holes need to be mapped with the studs in mind. This is where the pipe will be threaded through.

The wood all stained - Cut, sand, stain and finish the shelves. If I were to do it again, I would have bought thicker wood. I think 2inch would have given a nice chunky look to the unit. I do like the dark stain I chose. It really fits with the rest of the apartment.
- Build from the bottom up. It isn't very stable at first, but it comes together at the end. Have patience!
 |
| At first, I didn't have the top shelf, but it didn't look right |
 |
| With the top shelf |
Anyway, I really like the shelves (even though one of them is a little warped). We definitely would have been swimming in yarn if I hadn't built it!

